In the SAP world, efficiency and simplicity are paramount. One way to achieve this is by creating parameter transactions, also known as parameter transactions. These transactions allow you to pre-assign values to fields on the initial screen of a transaction, which streamlines data entry and facilitates table maintenance. In this article, we will guide you through the steps to create parameter transactions in SAP.
Contents
- 1 Step 1: Accessing the SE93 Transaction or Object Navigator
- 2 Step 2: Define the Transaction Code and Description
- 3 Step 3: Select Parameter Transaction Type
- 4 Step 4: Configure the Transaction Parameters
- 5 Step 5: Assign Values to Screen Fields
- 6 Step 6: Don’t forget to add the default values in transaction SU24
- 7 Conclusion
To create a parameter transaction, you can use transaction SE93 (Transaction Maintenance) or the Object Navigator. Here, we will show you how to do it using the Object Navigator, but the process to follow with the SE93 transaction is the same::
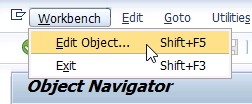
- Open the Object Navigator and select Workbench → Edit Object. This will open the object selection screen.
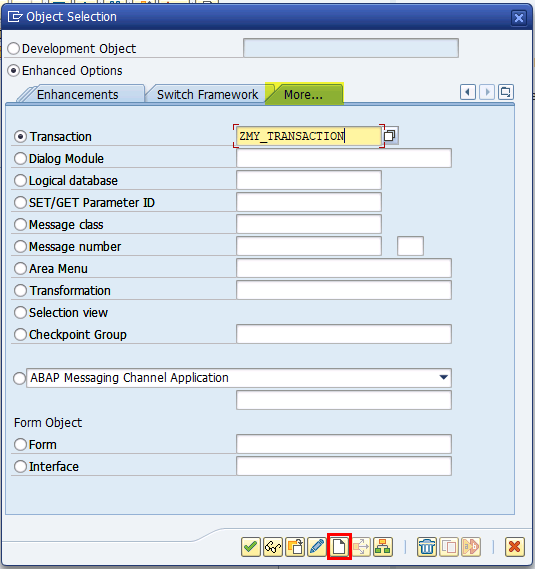
- In the “More” tab, enter the name of the transaction you wish to create in the “Transaction” field.
- Click on “Create”, which will appear as a quick hint, which will open the transaction creation screen.
Step 2: Define the Transaction Code and Description
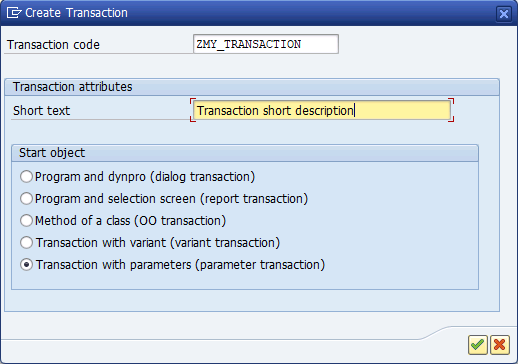
On the transaction creation screen, provide the following essential information about the new parameter transaction:
- Transaction Code: Enter a unique transaction code of up to 20 characters in the corresponding field. You can leave the one you have previously entered, modify it if you wish.
- Short Description: Provide a meaningful description of the transaction in the “Short Text” field.
Step 3: Select Parameter Transaction Type
On the same transaction creation screen, select the type of transaction you are creating, which in this case is “Transaction with parameters”.
Step 4: Configure the Transaction Parameters
- In the “Transaction” field, enter the name of the transaction you need for this operation.
- Enter the number of the initial screen in the corresponding field. This is crucial to define which screen will be displayed when the transaction is initiated.
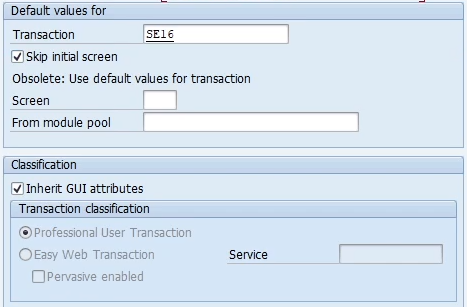
- You can choose to hide the initial screen of a parameter transaction if you have specified values for all its fields. This can be useful when you want to simplify data entry as much as possible.
For table display
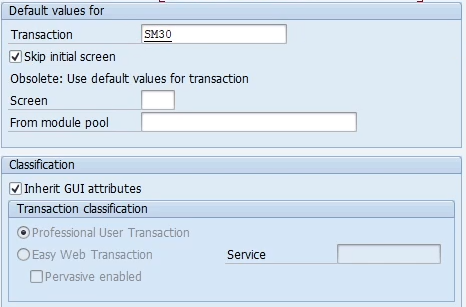
To create a transaction for table visualization, enter transaction SE16, select “Skip initial screen”, and leave the “Screen” field blank:
For table modification
To create a transaction for table modification, enter transaction SM30, select “Skip initial screen”, and leave the “Screen” field blank:

Step 5: Assign Values to Screen Fields
In the “Create Parameter Transaction” screen, you will find the “Default Values” table. Here you can enter the names of the screen fields and their associated values.
For table display
In this case we will enter the field ‘DATABROWSE-TABLENAME’, and the Value of the table we want:

For table modification
In this case, we will enter the field ‘UPDATE’ with the Value ‘X’ and the field VIEWNAME with the Value of the table we want:

Step 6: Don’t forget to add the default values in transaction SU24
Once the transaction is created, it is a good practice to add the S_TABU_NAM object to the default authorizations of the new transaction.
Conclusion
Creating parameter transactions in SAP is a powerful way to streamline the data entry process and facilitate table maintenance. By following these simple steps, you will be able to create customized transactions that perfectly suit your needs and improve the efficiency of your work in the SAP system. Take advantage of this functionality to simplify your daily tasks!

